DRINKS
Want To Brew Your Own Beer? Here’s How!
Published
7 months agoon
By
wpadminee
Brewing beer at home is a rewarding and enjoyable process. With the right ingredients and equipment, you can make your own unique craft beer. This guide will show you how to brew beer from start to finish.
Whether you’re a beginner or looking to refine your skills, this article will walk you through every stage of the brewing process.
Ingredients You’ll Need
To start brewing, gather these essential ingredients:
- Malt (Barley or other grains)
- Water
- Hops
- Yeast
- Priming Sugar
Each ingredient plays a key role in the beer-making process. Malt provides the sugars needed for fermentation, hops add bitterness and flavor, yeast ferments the sugars, and water makes up the majority of the beer’s volume.
Equipment for Brewing Beer
Before learning how to brew beer, ensure you have the following equipment:
- Brew kettle (a large pot for boiling)
- Fermenter (a sealed container for fermentation)
- Airlock (to let gas escape during fermentation)
- Siphon tubing (for transferring beer)
- Bottles and bottle caps
- Thermometer (to measure temperature)
- Sanitizer (for cleaning equipment)
Proper sanitation is crucial when brewing beer. Always clean and sanitize your equipment to avoid bacteria that could spoil your batch.
How to Brew Beer
Step 1: Heat the water and malt
To begin the process of how to brew beer, fill your brew kettle with water. Heat the water to around 160°F (71°C), then add your malt extract or crushed grains. Stir the mixture thoroughly to prevent clumping.
Mash Process
In this step, you’re creating the “mash.” The heat allows the enzymes in the malt to convert the starches into fermentable sugars. Keep the temperature steady for about 60 minutes. This process extracts the necessary sugars to feed the yeast during fermentation.
Step 2: Boil and add hops
After the mash is complete, increase the heat and bring the mixture to a boil. This boiling process is essential when learning how to brew beer because it sterilizes the wort (unfermented beer). Once the mixture reaches a rolling boil, it’s time to add the hops.
Why add hops?
Hops add bitterness, flavor, and aroma to your beer. The longer the hops boil, the more bitterness they impart. Add hops at various stages during the boil to achieve the desired flavor. Typically, the boil lasts about 60 to 90 minutes.
Step 3: Cool the wort
After boiling, the next critical step in how to brew beer is cooling the wort as quickly as possible. Rapid cooling prevents bacterial contamination and helps improve clarity. Use an ice bath or a wort chiller to bring the temperature down to around 70°F (21°C).
Why is cooling important?
Cooling the wort quickly is vital because yeast thrives at lower temperatures. If the wort is too hot, the yeast will die or produce unwanted flavors. A wort chiller can cool the liquid faster than an ice bath, making it a helpful tool in brewing.
Step 4: Transfer to the fermenter
Once the wort is cool, carefully transfer it to the fermenter using a siphon. Avoid splashing, as too much oxygen at this stage can affect the beer’s flavor. Secure the fermenter with an airlock.
The next step in how to brew beer is adding the yeast (pitching). Sprinkle the yeast over the cooled wort and close the fermenter. The yeast will begin to ferment the sugars, producing alcohol and carbon dioxide.
Step 5: Ferment the beer
Fermentation is a crucial part of how to brew beer. Store the fermenter in a dark, cool place, ideally around 65-75°F (18-24°C). Depending on the yeast strain and beer style, fermentation will take about one to two weeks.
What happens during fermentation?
During fermentation, yeast consumes the sugars in the wort, producing alcohol and carbon dioxide. The airlock allows gas to escape while keeping contaminants out. Monitor the fermentation process by watching for bubbles in the airlock. When bubbling slows, fermentation is nearing completion.
Step 6: Bottle the beer
After fermentation, it’s time to bottle your beer. First, you’ll need to mix priming sugar with the beer. This step is crucial because it triggers a small secondary fermentation in the bottles, creating carbonation.
How to bottle beer
- Clean and sanitize your bottles and caps.
- Dissolve priming sugar in water and add it to the beer.
- Use a siphon to transfer the beer into bottles, leaving about an inch of space at the top.
- Cap the bottles tightly.
Let the bottles sit at room temperature for one to two weeks. This waiting period allows the beer to carbonate.
Step 7: Store and enjoy your beer
Once the beer is carbonated, store the bottles in a cool, dark place. When you’re ready to enjoy your brew, chill a bottle, open it carefully, and pour it into a glass. Be sure to leave any sediment at the bottom of the bottle behind.

Frequently Asked Questions (FAQs) on How to Brew Beer
1. How long does it take to brew beer?
The entire process of how to brew beer, from boiling to bottling, takes about four to six weeks. The brewing process itself takes a few hours, but fermentation and carbonation require time. Fermentation can last one to two weeks, while carbonation in the bottles usually takes another one to two weeks.
2. What is the best temperature for fermentation?
The ideal fermentation temperature for most ales is between 65-75°F (18-24°C). If the temperature is too high, the yeast may produce unwanted flavors. Keeping the fermenter in a cool, stable environment helps ensure a clean fermentation.
3. Can I brew beer without hops?
Yes, it’s possible to brew beer without hops, but hops provide bitterness and balance to the beer’s sweetness. Without hops, your beer may taste overly sweet and lack the flavor complexity hops provide. Historically, people used herbs like gruit instead of hops for bitterness.
4. What type of yeast should I use for brewing beer?
The type of yeast you choose depends on the style of beer you want to brew. For ales, ale yeast works best, while lagers require lager yeast. Ale yeast ferments at higher temperatures and produces fruity, complex flavors. Lager yeast ferments at cooler temperatures, resulting in a cleaner, crisper taste.
5. Can I brew beer with fruits or spices?
Yes, many homebrewers add fruits or spices to their beer for unique flavors. These ingredients can be added during fermentation or the brewing process. Common additions include citrus zest, berries, cinnamon, and vanilla. However, it’s important to balance these flavors with the beer’s base ingredients.
6. How can I improve my beer’s clarity?
To improve beer clarity, ensure you cool the wort quickly after boiling. Adding a clarifying agent like Irish moss or gelatin can also help. Finally, allow enough time for fermentation and carbonation, as beer often clears up after extended time in the bottle.
7. What if my beer doesn’t carbonate?
If your beer doesn’t carbonate, it may be due to insufficient priming sugar or improper sealing of the bottles. Ensure that you add the right amount of priming sugar and that your bottles are tightly capped. In some cases, giving the beer more time to carbonate can resolve the issue.
8. How do I avoid contamination when brewing beer?
Sanitation is key to avoiding contamination. Always clean and sanitize your equipment before and after use. Contaminants like bacteria and wild yeast can spoil your beer if they enter the brewing process. Using an airlock during fermentation also prevents contamination.
9. Can I brew beer without a kit?
Yes, you can brew beer without a kit by gathering the necessary ingredients and equipment separately. Brewing from scratch gives you more control over the beer’s flavor and ingredients.
However, kits can be a great option for beginners who want a simple way to start brewing.
10. How to brew beer at home for beginners?
Beginners can start by using a beer brewing kit, which includes pre-measured ingredients and instructions. Following this step-by-step guide on how to brew beer is another great way to learn.
Begin with basic equipment and ingredients, practice sanitizing, and follow each step carefully for a successful batch.
Conclusively, learning how to brew beer at home is both fun and satisfying. By following the steps outlined in this guide, you can create your own craft beer in just a few weeks.
Whether you’re experimenting with different ingredients or perfecting your technique, brewing beer is a creative process with endless possibilities. With patience and practice, you’ll master how to brew beer and enjoy the fruits of your labor with friends and family.
If you enjoyed this article and would like to read more on drinks, visit this page.
You may like
-

3 Best Nigerian Drink Recipes To Share Love This Season
-


More Benefits To Pineapple Than You Think? Check These Out
-


Are Alcoholic Drinks Only Harmful? See Surprising Health Benefits
-

You Can Make Your Kunu Drink With This Simple Recipe
-


5 Health Benefits Of Drinking Warm Water Early In The Morning
-


Ever Tasted Sweet Plum Juice? Here’s How To Brew One!
DRINKS
3 Best Nigerian Drink Recipes To Share Love This Season
Published
4 months agoon
December 22, 2024By
wpadminee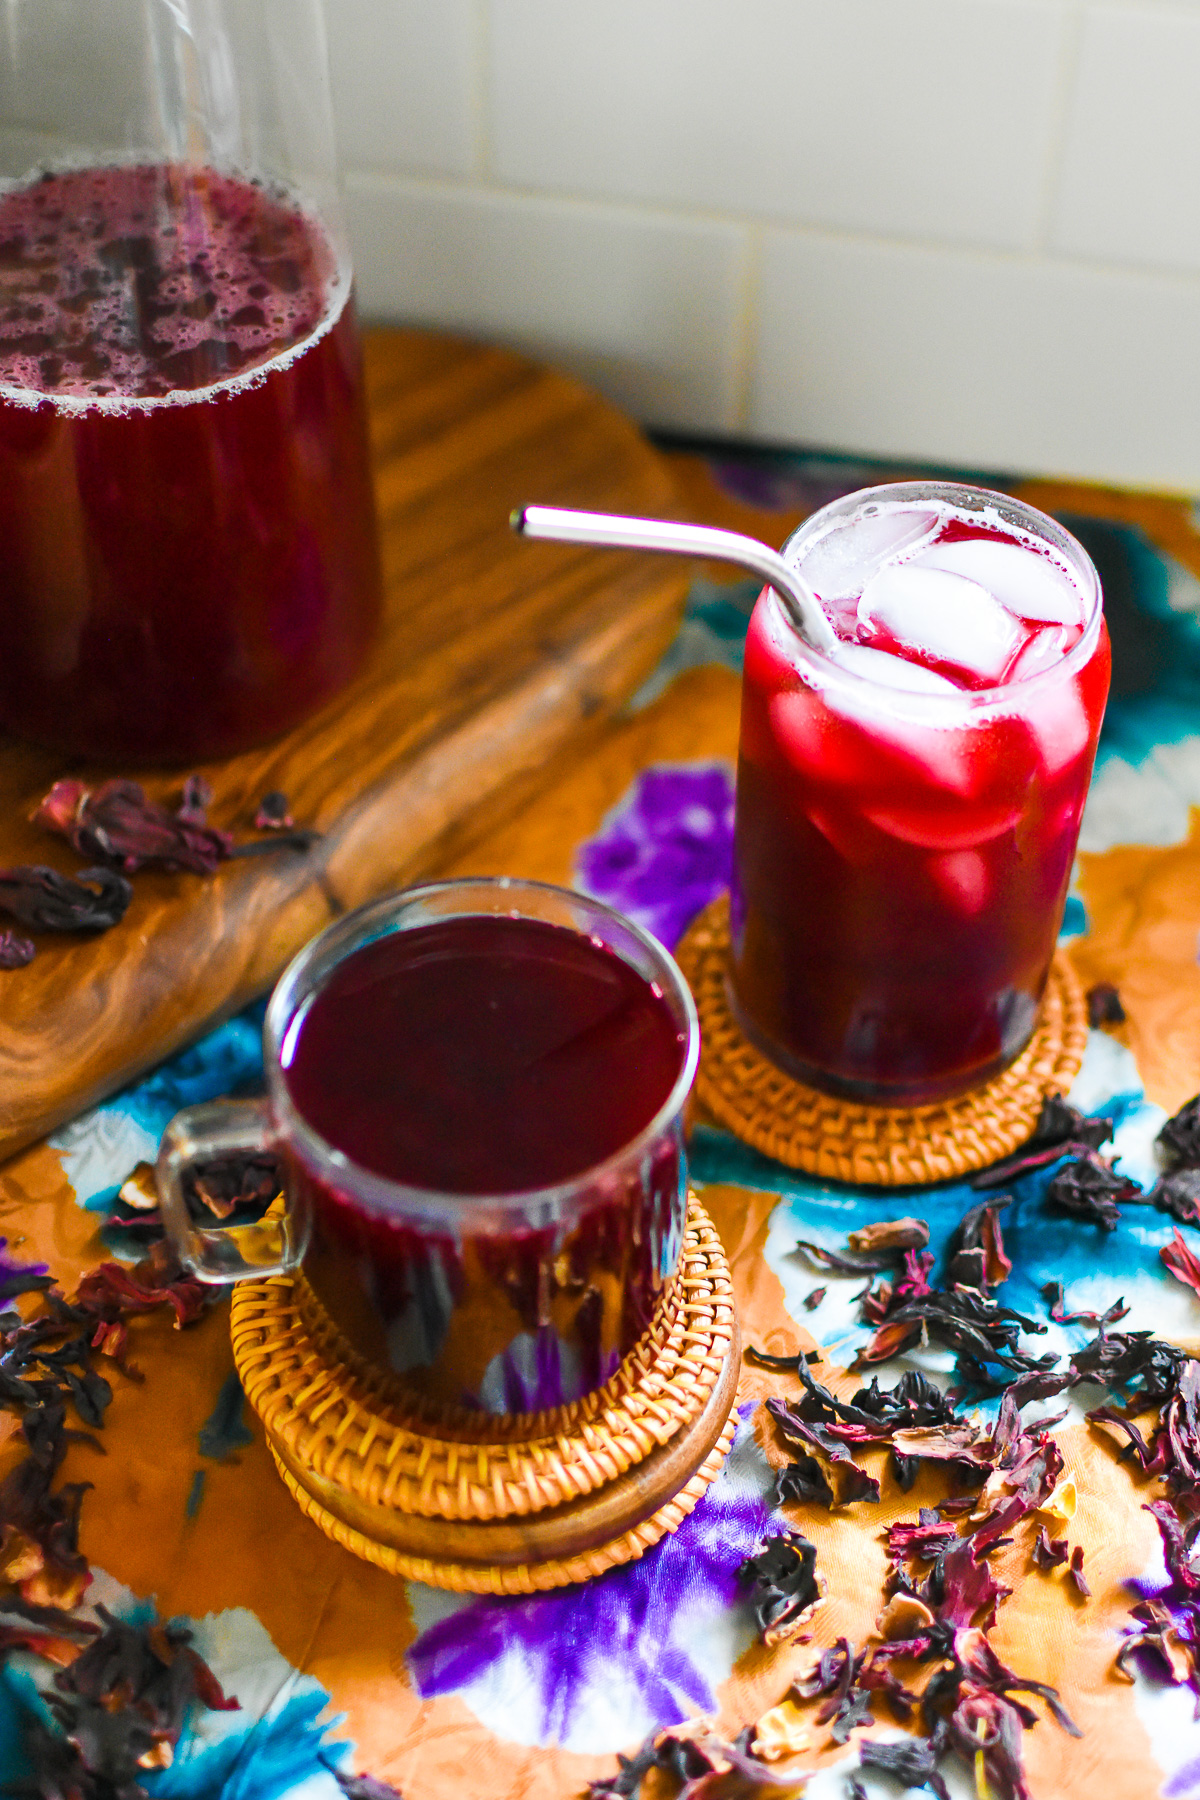
Are you planning to celebrate the holiday season by inviting loved ones to share delicious moments? You can delight them with Nigerian drink recipes for Christmas that inspire joy and connection.
Drinks play a central role in festive gatherings, making them the perfect way to create cherished memories. Here are three traditional and modern Nigerian drink recipes for Christmas that will elevate your festive experience.
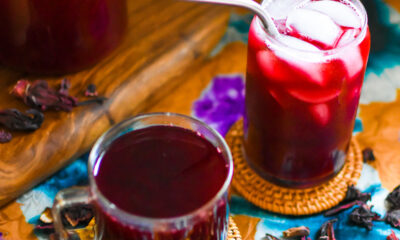
1. Zobo (Hibiscus Tea)
Zobo is a refreshing and tangy drink made from dried hibiscus petals. This vibrant beverage is a favourite at Nigerian gatherings and a symbol of hospitality. It’s rich in flavour and easy to prepare.

Ingredients:
- Dried hibiscus petals (zobo leaves)
- Pineapple peels and ginger
- Cloves (optional)
- Sugar or honey
- Water
Preparation:
- Rinse the zobo leaves to remove impurities.
- Boil them with pineapple peels, ginger, and cloves for added flavour.
- Strain the liquid and sweeten it with sugar or honey.
- Serve chilled for a refreshing Christmas drink.
Zobo is versatile and can be infused with fruit juices for a personalised touch. It’s an iconic inclusion in Nigerian drink recipes for Christmas.
2. Nigerian Chapman
Chapman is often called “Nigeria’s cocktail.” This sparkling, fruity drink combines bold flavours and a touch of nostalgia. It’s a great non-alcoholic option to add sparkle to your celebrations.
Ingredients:
- Grenadine syrup
- Lemon-lime soda and bitter lemon
- Slices of orange, lemon, and cucumber
- Ice cubes
Preparation:
- In a glass, mix grenadine syrup with ice cubes.
- Add equal parts of lemon-lime soda and bitter lemon.
- Garnish with orange, lemon slices, and cucumber.
Chapman is perfect for sharing festive cheer with family and friends. Its sweet and tangy taste makes it a staple in Nigerian drink recipes for Christmas.
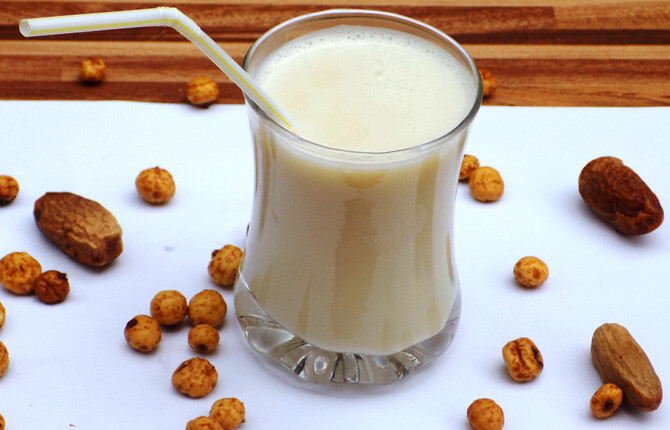
3. Tiger Nut Milk (Kunun Aya)
This creamy, nutritious drink is made from tiger nuts, a superfood cherished for its health benefits. Tiger nut milk is a wholesome way to toast to health and happiness this holiday season.
Ingredients:
- Tiger nuts (soaked overnight)
- Water
- Sweeteners like dates or honey
- Optional: vanilla or cinnamon for added flavour
Preparation:
- Blend the soaked tiger nuts with water until smooth.
- Strain the mixture using a muslin cloth or fine sieve.
- Sweeten with dates or honey and flavour with vanilla or cinnamon.
Tiger nut milk is dairy-free and loaded with nutrients, making it a unique addition to Nigerian Christmas drink recipes.
Tips for Serving Nigerian Christmas Drinks
- Elevate Presentation: Use decorative glasses or jars and garnish with fresh fruits or herbs.
- Chill Well: Serve your drinks cold to enhance their refreshing qualities.
- Customise Flavours: Add seasonal spices like cinnamon or nutmeg to give traditional recipes a holiday twist.
These Nigerian drink recipes for Christmas embody the essence of love, warmth, and togetherness. With each sip, you’ll be creating memories that linger long after the celebrations are over. Cheers to a flavourful and joyous holiday season!
For more detailed recipes, check here.
DRINKS
More Benefits To Pineapple Than You Think? Check These Out
Published
4 months agoon
December 8, 2024By
wpadminee
Pineapple drink isn’t just a tropical delight – it’s a powerhouse of health benefits. From boosting immunity to enhancing skin health, this vibrant fruit packs a punch.
Let’s explore the surprising benefits of pineapple drink, why you should incorporate it into your diet, and how it impacts overall health.
1. Rich Source of Nutrients
Pineapple is loaded with vitamins, especially vitamin C, and minerals like manganese and potassium. These nutrients support essential bodily functions, from boosting energy to strengthening bones.
Key Benefits:
- Vitamin C enhances immunity and skin health.
- Manganese supports bone density and metabolism.
- Bromelain, a unique enzyme, aids digestion and reduces inflammation.
2. Boosts Immunity
One major benefit of pineapple drink is its ability to fortify the immune system. Thanks to its high vitamin C content, it helps fight off infections and supports wound healing. Regular consumption keeps common colds at bay and enhances the body’s defence mechanism.
3. Promotes Digestive Health
Bromelain, found only in pineapples, plays a vital role in digestion. This enzyme breaks down proteins, making them easier to absorb.
It reduces bloating and aids in relieving constipation. Including pineapple drink in your diet ensures smoother digestion and gut health.
4. Fights Inflammation
The anti-inflammatory properties of pineapple, particularly due to bromelain, help combat chronic conditions like arthritis and sinusitis.
It reduces swelling and relieves pain, especially after surgery or intense exercise. Studies suggest bromelain may even complement antibiotic treatments, improving their effectiveness.
5. Supports Healthy Skin
Pineapple drink benefits your skin in multiple ways. Rich in antioxidants and vitamin C, it fights free radicals that cause ageing.
It promotes collagen production, keeping skin firm and radiant. Drinking pineapple juice can also help reduce acne and lighten blemishes.
6. Improves Heart Health
Drinking pineapple regularly supports cardiovascular health. Its high potassium content helps regulate blood pressure by counteracting sodium’s effects.
Antioxidants in pineapple reduce oxidative stress, lowering the risk of heart disease. Fibre from fresh pineapple drinks lowers cholesterol levels, enhancing heart function.
7. Enhances Eye Health
Pineapple drink contains beta-carotene and vitamin A, crucial for eye health. These nutrients protect against age-related macular degeneration and cataracts.
Regular consumption can help maintain clear vision and prevent eye-related disorders as you age.
8. Supports Bone Strength
Manganese in pineapple is essential for maintaining strong bones. This mineral, combined with calcium and copper, helps prevent osteoporosis and improves bone density.
Regular intake is particularly beneficial for postmenopausal women, reducing the risk of fractures.
9. Helps Weight Management
Pineapple is low in calories but rich in fibre, making it an ideal snack for weight management. It keeps you full for longer and prevents unnecessary cravings.
However, pineapple drinks should be consumed in moderation due to their natural sugar content.
10. Aids in Respiratory Health
For those with asthma or bronchial issues, pineapple drink offers significant relief. Bromelain reduces airway inflammation and improves breathing. Vitamin C further helps reduce symptoms related to allergic asthma.
11. Potential Cancer-Fighting Properties
Research suggests that pineapple may help combat cancer cells. Bromelain’s anti-inflammatory and antioxidant effects inhibit tumour growth and enhance the body’s immune response.
Regular consumption of pineapple drinks could be a preventive measure against certain cancers.
12. Protects Against Infections
Bromelain’s antibacterial properties help protect against harmful bacteria like E. coli. Some studies indicate that combining pineapple with antibiotics enhances their effectiveness.
Including pineapple in your diet strengthens your overall defence against infections.
How to Maximise the Benefits
For optimal results, choose fresh or cold-pressed pineapple juice. Avoid processed versions with added sugars. Drinking 8 ounces of pure pineapple juice daily provides ample nutrients without excessive sugar intake.
The benefits of pineapple drink extend beyond its tropical taste. From boosting immunity to supporting bone health and fighting inflammation, this fruit offers impressive advantages.
Make pineapple a regular part of your diet and enjoy its myriad health benefits.
Incorporating pineapple into your daily routine provides more than just flavour—it’s a step towards better health. Embrace this superfruit and experience its remarkable benefits.
For more articles on drinks, check here.
DRINKS
Are Alcoholic Drinks Only Harmful? See Surprising Health Benefits
Published
4 months agoon
November 30, 2024By
wpadminee
Research indicates that moderate alcohol consumption may offer subtle health benefits. Specific drinks contain compounds that can potentially provide modest wellness advantages when consumed judiciously.
However, experts emphasize that these benefits are minimal and do not outweigh the risks of alcohol consumption. Individuals should consult healthcare professionals before considering alcohol as part of their health strategy.
Reduced Risk of Heart Disease
One of the most well-known health benefits of alcoholic drinks is their potential to reduce the risk of heart disease.
Studies have shown that moderate alcohol consumption can increase levels of “good” cholesterol (HDL) and decrease levels of “bad” cholesterol (LDL).
Additionally, alcohol can help prevent blood clots, which can lead to heart attacks and strokes.
Lower Risk of Type 2 Diabetes
Research suggests that moderate alcohol consumption may lower the risk of developing type 2 diabetes. Alcohol can increase insulin sensitivity, helping the body use insulin more effectively.
However, it’s crucial to remember that excessive alcohol intake can lead to insulin resistance, which can increase the risk of diabetes.
Potential Cognitive Benefits
Some studies have indicated that moderate alcohol consumption may help protect against cognitive decline and reduce the risk of dementia, including Alzheimer’s disease.
The antioxidants and other compounds found in certain alcoholic beverages, such as red wine, may play a role in these protective effects.
Stress Relief and Improved Mood
Alcohol is often used socially to relax and unwind. It can help reduce stress and anxiety, and it may even improve mood in small doses.
However, it’s important to be aware that excessive alcohol consumption can lead to negative mood changes and worsen mental health conditions.
Potential Anti-Inflammatory Effects
Certain compounds found in alcoholic beverages, such as polyphenols, have anti-inflammatory properties. These compounds may help reduce inflammation throughout the body, which can contribute to various health conditions.
Reduced Risk of Gallstones
Moderate alcohol consumption has been linked to a reduced risk of gallstones, which are small, hard substances that form in the gallbladder. Alcohol can help regulate bile flow, which may help prevent gallstone formation.
Social Benefits
Alcohol has been a part of social gatherings and celebrations for centuries. Moderate alcohol consumption can facilitate social interaction and bonding, which can have positive effects on mental health.
Consuming alcoholic drinks in moderation is essential to gain their health benefits. Excessive alcohol consumption can lead to a wide range of health problems. This includes liver damage, addiction, and increased risk of various cancers.
If you choose to drink alcohol, it’s crucial to do so responsibly and in moderation. Consult with a healthcare professional to determine what is considered moderate drinking for you.
Remember, the key to reaping the potential health benefits of alcoholic drinks is to drink responsibly and in moderation.
For more reads on drinks, click here.
Latest


Samsung Galaxy S25 Series Sets The Standard Of AI Phones As A True AI Companion
Samsung Galaxy S25 series sets the standard of AI phones as a true AI companion …Pioneering the multimodal era with...


5 Things To Expect In Afrobeats In 2025
Afrobeats is poised to reach unprecedented heights in 2025 as Nigerian music continues its remarkable global ascent. The genre’s explosive...


Here Are The 7 Most Ancient Countries On Earth
The oldest countries in the world stand as remarkable testaments to human civilisation, each containing landscapes and monuments that narrate...


Why Self-Reflection Is More Important Than Resolutions
Millions of people embark on a yearly ritual: they sit down with a notebook and pen, eager to craft a...


Nollywood Director, Kemi Adetiba Teases King Of Boys 3
Nollywood director Kemi Adetiba has revealed that another instalment of King of Boys will be released on December 25, 2025....


John McEnroe Says He Can Be The Commissioner Tennis Needs Amid Doping Crisis
Recent doping controversies involving top players have not damaged tennis’s reputation, but John McEnroe believes that appointing a single commissioner...


“Everybody Loves Jenifa” Becomes Nollywood’s Highest-Grossing Film Of All Time
Nollywood filmmaker Funke Akindele has achieved a historic milestone with her latest film, “Everybody Loves Jenifa.” The film has officially...


FG To Premiere TV Series, “Hidden Riches” On Mining Sector On January 25
Nigeria’s Federal Government will launch an ambitious television drama series focused on the nation’s mining sector, premiering “Hidden Riches” on...


Qing Madi Delivers A Soulful Performance Of “Favourite Pyscho”
Rising Afro-RnB sensation Qing Madi launches into 2025 with a mesmerising performance on the prestigious COLOURS platform, showcasing her latest...


Taiwo Awoniyi’s First Goal Of The Season Seals Nottingham Forest’s Win Over Wolves
Taiwo Awoniyi made a triumphant return to Premier League action. He scored in stoppage time to help Nottingham Forest crush...
-Ad-


