

FOOD
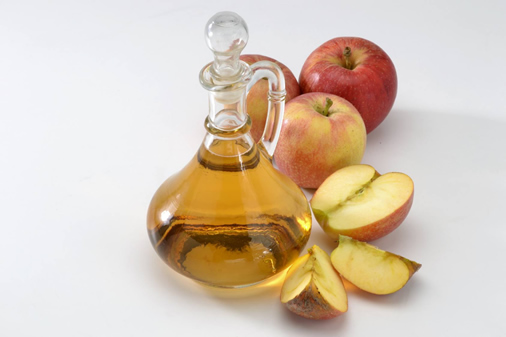
6 Things Apple Cider Vinegar Can Do For You

Apple cider vinegar is made from apples that have undergone fermentation to form health-promoting probiotics as well as enzymes thereby giving it less sugar and fewer calories than the apple juice. It has a characteristic amber color.
Over the years, apple cider vinegar has been used for different purposes; cooking, baking, bathing etc because of its natural health benefit. It is rich in minerals, vitamins (vitamin A, B1, B2, B6, C and E) and pectin.
These are the top 6 amazing things apple cider can do for you.
Enhances weight loss
Regular consumption of apple cider vinegar helps in losing weight. It also decreases calorie intake. Calorie is a fat substance that builds up in the arteries causing them to narrow and harden.
It regulates blood sugar
The body produces insulin which manages sugar level in the body. Insulin is the hormone responsible for transporting sugar from the blood to the tissues which uses it as fuel. Apple cider vinegar improves the sensitivity of insulin.
It fights infection
Apple cider vinegar has an antiseptic property that fight against bacterial and fungal infections. It can also be used in treating ear infections and bladder infections.
To treat an ear infection, dilute it with water and rinse the ear with it. For bladder infection, drink a teaspoon of diluted apple cider vinegar.
Reduces blood pressure
High blood pressure is one of the major factors of heart disease. It makes the heart work more than usual thereby weakening the heart muscle. Apple cider vinegar helps to keep the heart healthy and strong. Aside using apple cider vinegar, you should eat more food with magnesium and potassium. Swap salt and processed food for whole foods.

It soothes cough and cold
Apple cider vinegar can be used as a remedy for common cold and cough. Mix one teaspoon of apple cider vinegar, honey and warm water. Drink one teaspoon of the mixture three times a day and watch your cold and cough disappear like thin air.
It treats constipation
Apple cider vinegar can be used as a natural treatment for constipation. It contains pectin; a fiber that promotes bowel movement. Add two tablespoons of apple cider vinegar to a glass of water and drink it three times a day.
It nourishes the hair
Apple cider vinegar can be used as a conditioner for the hair. It nourishes the hair, gives it a good shine and soft texture. It can also be used to treat dandruff as it restores the pH balance of the scalp.
Mix equal portions of apple cider vinegar to the scalp and leave for a few minutes before you rinse it out.


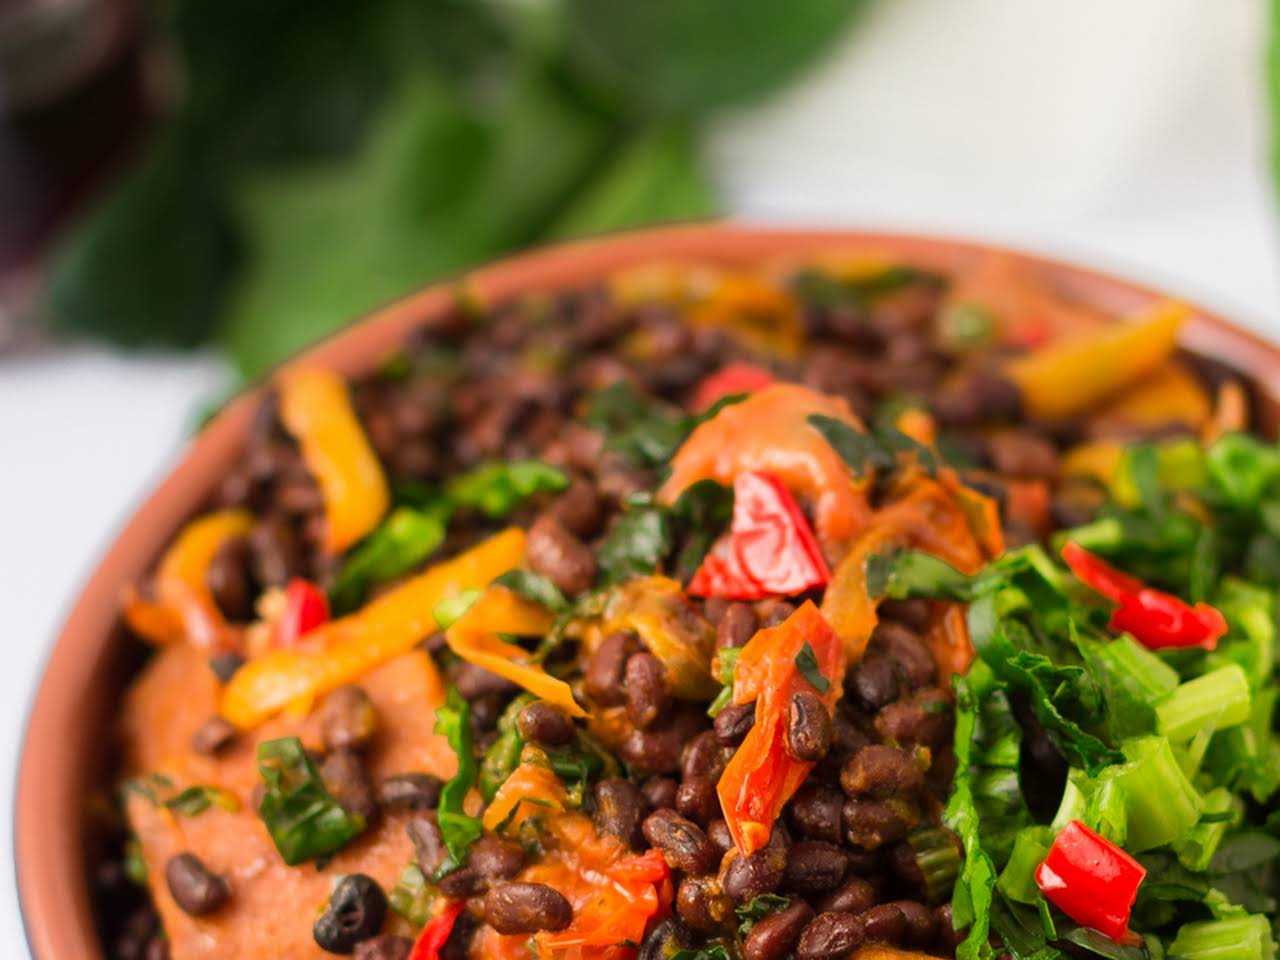
Akidi (black beans) recipes are a cornerstone of Enugu State’s culinary heritage, enjoyed widely across Nigeria and Africa. This versatile legume, rich in protein, fibre, and essential vitamins, makes it a nutritious staple in many homes.
Originating from Enugu, akidi holds a special place in traditional dishes, offering robust flavour and health benefits.
If you’re looking to expand your cooking repertoire, these three delicious akidi (black beans) recipes will elevate your meals.
Whether you’re an experienced chef or a kitchen novice, each akidi (black beans) recipe provides a unique taste experience.
Embrace the richness of Enugu’s culture and impress your family with these flavourful and nutritious dishes featuring the beloved black beans.
Recipe 1: Classic Akidi Soup

Ingredients:
- 1 cup dried black beans (akidi)
- 1 large onion, chopped
- 2 scotch bonnet peppers, chopped
- 2 tablespoons palm oil
- 1 teaspoon dried crayfish
- 1 teaspoon salt
- 1/2 teaspoon black pepper
- 1 stock cube
- Water
Instructions:
- Soak the beans: Rinse the black beans and soak them in water overnight.
- Cook the beans: Drain the soaked beans and add them to a pot with fresh water. Bring to a boil, then reduce heat and simmer until the beans are tender.
- Sauté the aromatics: Heat the palm oil in a separate pot. Add the chopped onion and scotch bonnet peppers, and sauté until fragrant.
- Combine the ingredients: Add the sautéed ingredients to the pot of cooked beans. Stir in the dried crayfish, salt, black pepper, and stock cube.
- Simmer and serve: Simmer the soup for an additional 10-15 minutes, or until the flavours are well combined. Serve hot.
Recipe 2: Akidi with Spinach and Plantain

Ingredients:
- 1 cup cooked black beans (akidi)
- 1 bunch spinach, chopped
- 2 ripe plantains, sliced
- 1 onion, chopped
- 2 cloves garlic, minced
- 1 teaspoon ginger, grated
- 1 teaspoon curry powder
- 1/2 teaspoon turmeric powder
- Salt to taste
- Vegetable oil
Instructions:
- Heat the vegetable oil in a pot. Add the onion, garlic, and ginger, and sauté until fragrant.
- Add the spinach: Add the chopped spinach to the pot and stir until wilted.
- Combine the ingredients: Add the cooked black beans, curry powder, and turmeric powder to the pot. Stir to combine.
- Fry the plantains: In a separate pan, fry the plantain slices until golden brown.
- Serve: Serve the akidi and spinach mixture with the fried plantains.
Recipe 3: Akidi with Smoked Fish and Vegetables

Ingredients:
- 1 cup cooked black beans (akidi)
- 1 smoked fish, crumbled
- 1 large onion, chopped
- 2 carrots, diced
- 1 green bell pepper, diced
- 1 teaspoon thyme
- 1/2 teaspoon black pepper
- Salt to taste
- Vegetable oil
Instructions:
- Heat the vegetable oil in a pot. Add the onion, carrots, and bell pepper, and sauté until softened.
- Add the beans and smoked fish: Add the cooked black beans and crumbled smoked fish to the pot. Stir to combine.
- Season and simmer: Season with thyme, black pepper, and salt. Simmer for 10-15 minutes, or until the flavours are well-combined.
- Serve: Serve the akidi with smoked fish and vegetables hot with rice, yam, or bread.
These three akidi (black beans) recipes are just a starting point. Feel free to experiment with different ingredients and flavours to create your own unique dishes.
Remember, the key to a delicious akidi dish is to use high-quality ingredients and to cook slowly to allow the flavours to develop.
Whether you’re a seasoned cook or a novice in the kitchen, these akidi (black beans) recipes are a great way to enjoy this nutritious and flavourful legume.
For more articles on food recipes, visit here.


Samsung Galaxy S25 Series Sets The Standard Of AI Phones As A True AI Companion
Samsung Galaxy S25 series sets the standard of AI phones as a true AI companion …Pioneering the multimodal era with...


5 Things To Expect In Afrobeats In 2025
Afrobeats is poised to reach unprecedented heights in 2025 as Nigerian music continues its remarkable global ascent. The genre’s explosive...


Here Are The 7 Most Ancient Countries On Earth
The oldest countries in the world stand as remarkable testaments to human civilisation, each containing landscapes and monuments that narrate...


Why Self-Reflection Is More Important Than Resolutions
Millions of people embark on a yearly ritual: they sit down with a notebook and pen, eager to craft a...


Nollywood Director, Kemi Adetiba Teases King Of Boys 3
Nollywood director Kemi Adetiba has revealed that another instalment of King of Boys will be released on December 25, 2025....


John McEnroe Says He Can Be The Commissioner Tennis Needs Amid Doping Crisis
Recent doping controversies involving top players have not damaged tennis’s reputation, but John McEnroe believes that appointing a single commissioner...


“Everybody Loves Jenifa” Becomes Nollywood’s Highest-Grossing Film Of All Time
Nollywood filmmaker Funke Akindele has achieved a historic milestone with her latest film, “Everybody Loves Jenifa.” The film has officially...


FG To Premiere TV Series, “Hidden Riches” On Mining Sector On January 25
Nigeria’s Federal Government will launch an ambitious television drama series focused on the nation’s mining sector, premiering “Hidden Riches” on...


Qing Madi Delivers A Soulful Performance Of “Favourite Pyscho”
Rising Afro-RnB sensation Qing Madi launches into 2025 with a mesmerising performance on the prestigious COLOURS platform, showcasing her latest...


Taiwo Awoniyi’s First Goal Of The Season Seals Nottingham Forest’s Win Over Wolves
Taiwo Awoniyi made a triumphant return to Premier League action. He scored in stoppage time to help Nottingham Forest crush...

